
Quick start
Install the extension, pick your languages, and see your first bilingual subtitles right away.
This page walks you from zero to your first bilingual subtitles. We’ll assume you’ve already installed one of the editions—if not, start with Choose your edition.
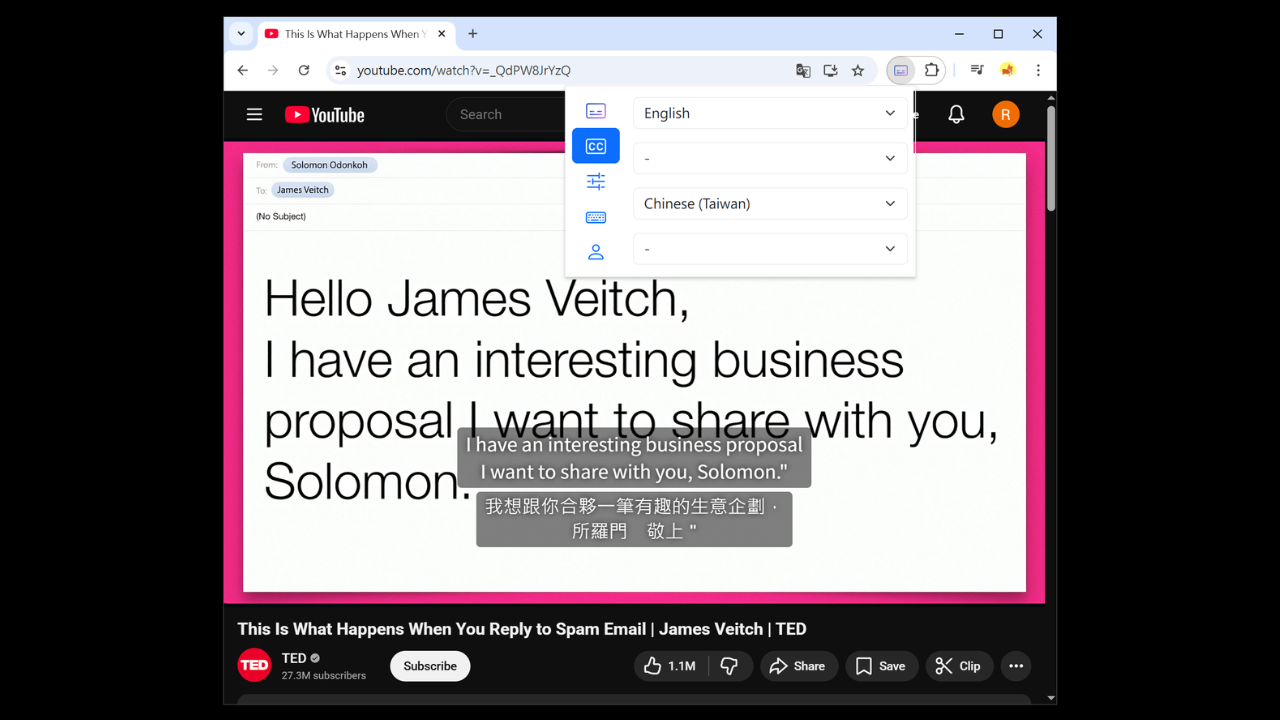
1. Open a video and open the extension
Pin the toolbar icon, then open a video on a supported site (YouTube, Netflix, or Coursera). Click the icon: color means it’s on, gray means click again to turn it on.
2. Pick your subtitle languages
Go to the Subtitles tab. There are four menus from top to bottom:
- Primary subtitle: The source language you want to hear and learn
- Primary translation: Translate the primary subtitle into a language you understand (choose ”—” if you don’t need it)
- Secondary subtitle: A second language to compare side by side (optional)
- Secondary translation: Translation for the secondary subtitle
Once you’ve chosen, subtitles appear on the video right away.
3. Make it look right
Subtitle position, fonts, size, and practice modes are all in the Settings tab. Want a quick visual refresh? Open Style Studio and pick a preset.
Want to go further?
- Turn videos into practice: Learning mode, Dictation, Speaking, Shadowing
- Make existing captions easier to read: AI Segmentation
- Want stronger translation and AI features? See Membership benefits